GC8 2.5RS Impreza Cabin Air Filter Cover
| Download/Purchase a Cover | Backstory | Installation Instructions | FAQ |
The Backstory
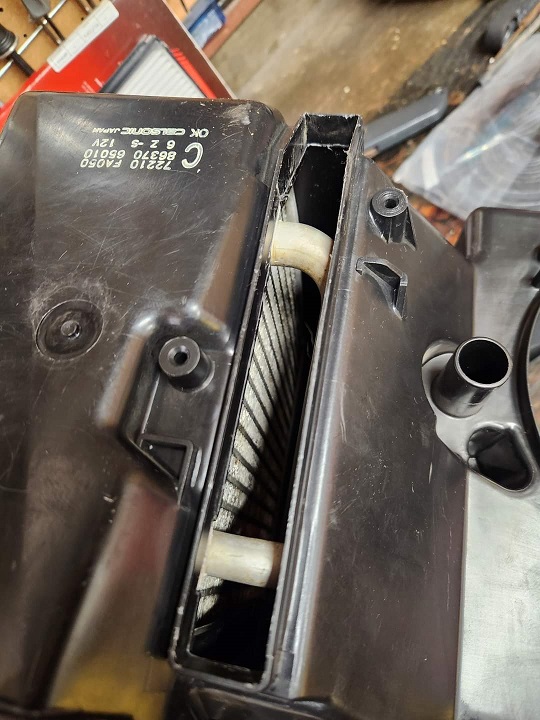
The 1998-2001 Subaru Impreza's (as well as Foresters), had an optional cabin air filter that could be installed. It works like this... The blower box that resides underneath the passenger footwell area has a pre-marked plastic area that can be cut/snapped out. Then the cabin air filter slides up into the opening and a metal/rubber cover screws on to hold it in place. This will filter all the outside air coming into your vents. It helps keep your car dust free. Unfortunately this cover has long been discontinued. I had alerts setup on eBay for over a year before I was able to find one. To my luck it was actually an overseas dealer liquidating their inventory and I ended up with 3 of them! Below are the oem part#'s:
- Cabin Air Filter Cover Kit (discontinued) - G3210FC010
- Cabin Air Filter Element (still available) - G3210FC000
The OEM filter is still available but it's $40+. I'm sure Subaru uses this filter in other cars that don't need the cover kit. It's also the filter I currently have installed in my car. An aftermarket version is also available for much cheaper. The Pentius PHBT6045 filter is about $16 shipped off Amazon.
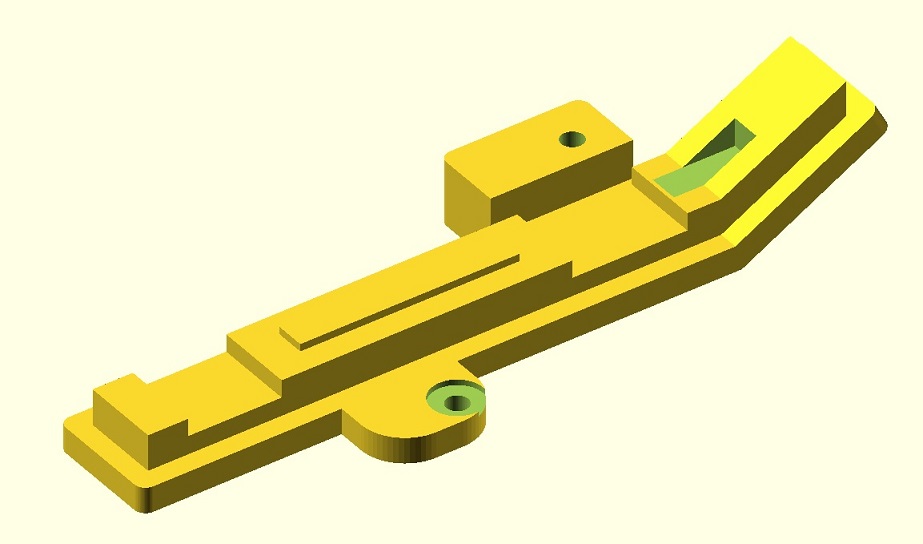
I tried to get a few different people to design a 3d replacement of this item to help other Subaru owners. I even took measurements for someone, and shipped them one of my covers. It didn't work out (I did get my cover back). So I decided to try it myself. I knew nothing about CAD or 3d printing. I tried several CAD programs which I was not very good at. Finally I discovered OpenSCAD which is more of a programmatical way of designing something. Once I had that piece tackled I spent about a week researching 3d printers. I decided to go with the Creality CR10S model. I set it up and did some test prints of simple items before messing with the cover.
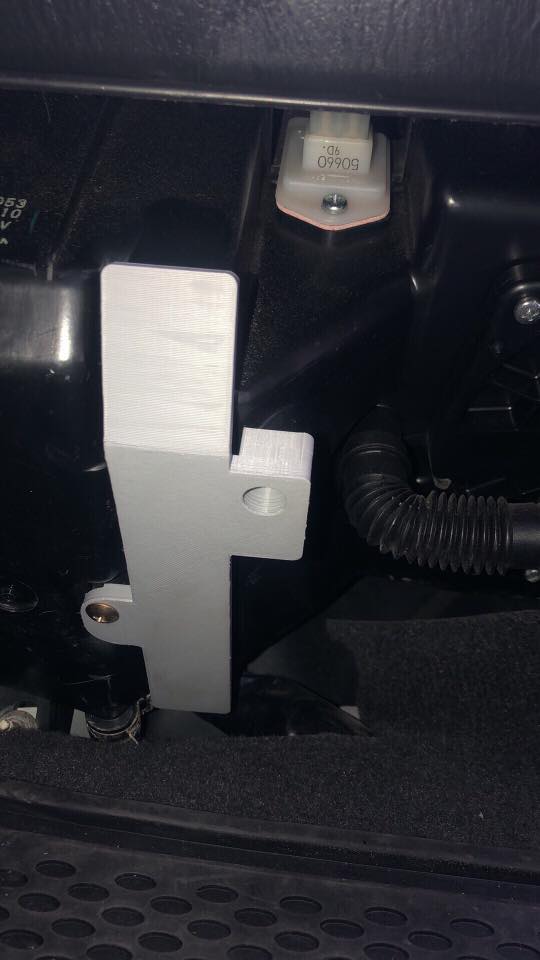
This is what I ended up with:
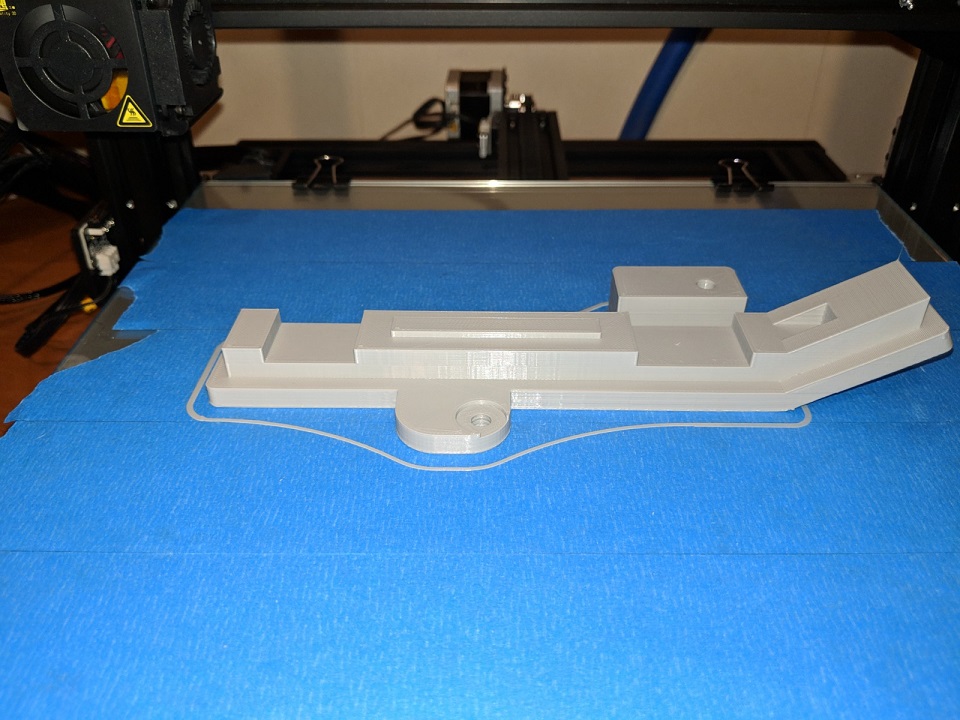
It wasn't perfect my first try. The first one I had to hack up to make it fit better. Version 2 was almost perfect but one of my holes was still off by about 1.5mm. Version 3 was just right. Here is a look of my progress compared to OEM. The print quality is in draft mode as well (0.2mm Z height). I could potentially make it smoother (0.1mm Z height), but I don't think it's needed with a part that is not visible. As is, it takes 4 hours to print.
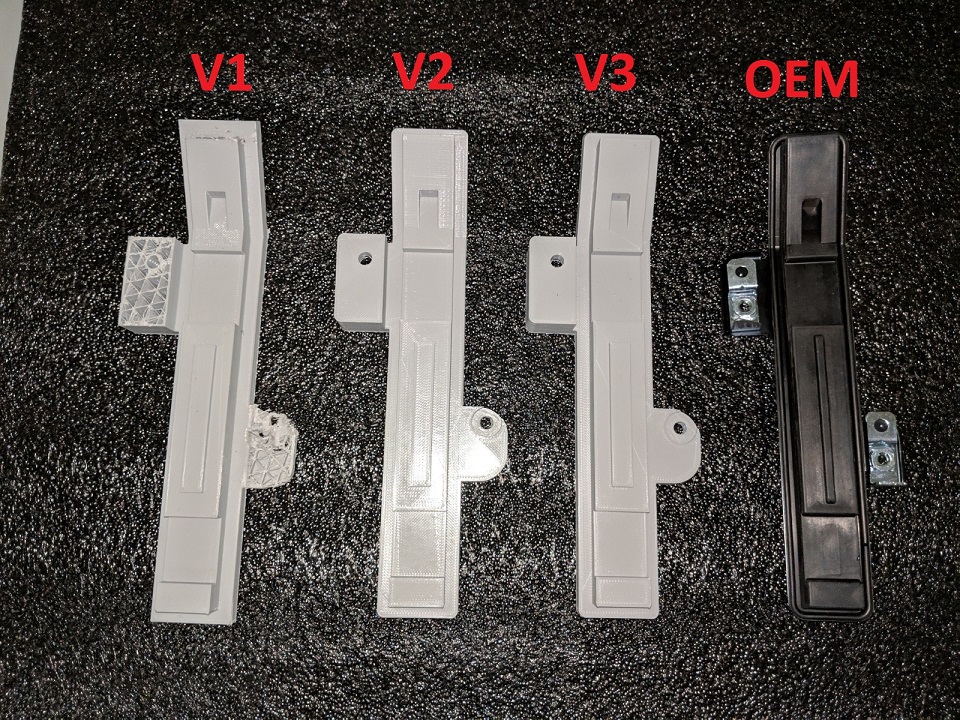
It fits really well too. I had envisioned putting some kind of foam tape around the edges, but I do not think it is needed. The part fits so snug that I can lift the entire air box up by the cover without it even screwed on. I'm going to do a test with the fan on high just to make sure it doesn't leak and I don't get any strange whistles. I already tried shaking the box violently and it nothing rattled around.
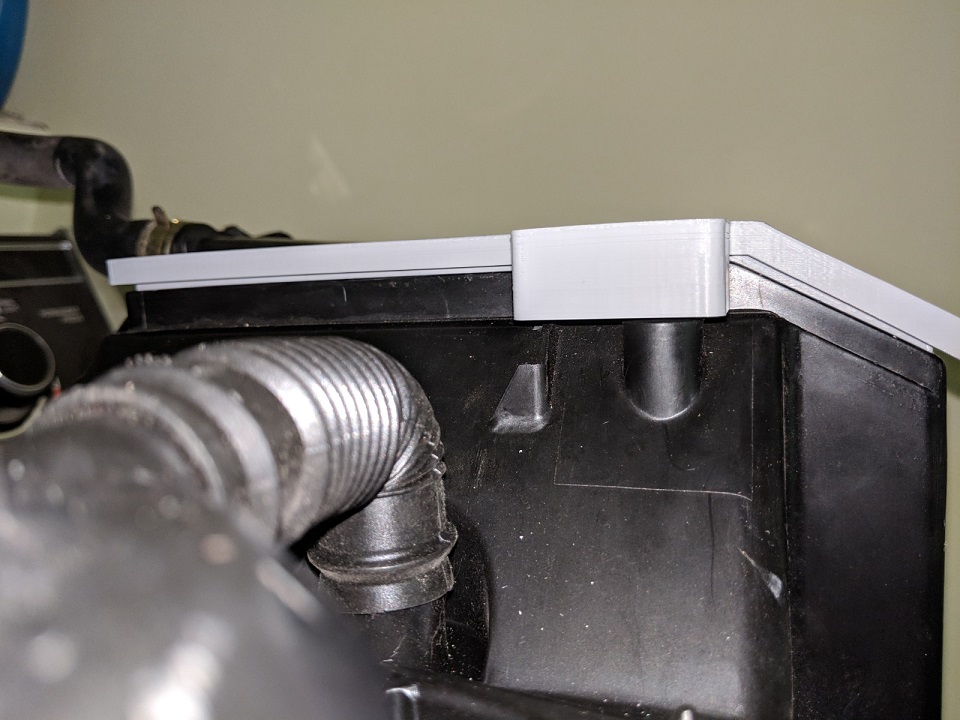
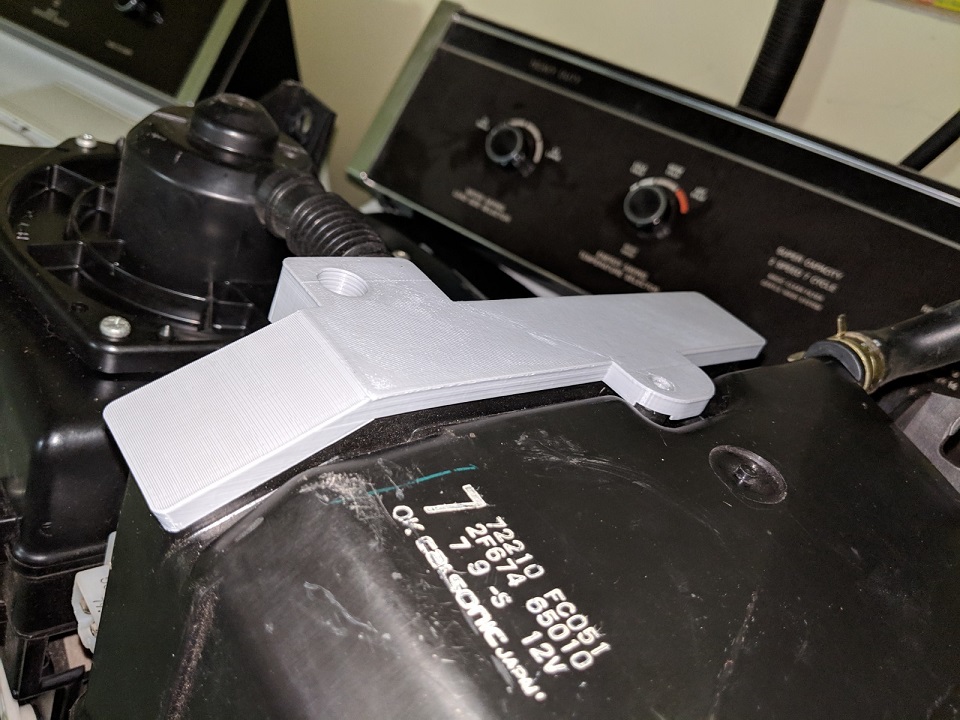
After some online discussion someone mentioned PLA not holding up well in hot cars. I knew I was printing it at 200C (392F). According to Google a car can reach temperatures up to 172F sitting outside in the sun at 100F. 172F is about 78C which is far less than the 200C printing temperature. However it turns out that PLA has a low soften temperature of about 60C. I did a test in my oven where I spanned the cover across some thick aluminum washers. I baked it for 30 minutes at 180F to simulate a car in the worst environment. Sure enough the PLA cover started to sag in the middle:/ When I removed it from the oven I probably could have folded it right in half.
I was forced to try a different material. It seems that ABS is the most common plastic to go with for automobile interior parts. It's the same price as a roll of PLA, but it is much harder to work with. It took me a while to get it dialed in. For starters the nozzle temp needed to be 250C instead of 200C. The Bed temp had to be 85C instead of 50C. It needs to stay warm while printing so I had to make an enclosure to keep the heat in, and I had to turn off the cooling fan (well drop it to 5%). ABS does not want to stick to the build plate as well either. It likes to curl up on the edges. With PLA I could print directly on the build plate. I have to use some sticky hair spray to keep the ABS down. Then finally I need to print about 25% slower to get good layers. I finished up the same oven test and it was a success. No sagging, and it still feels just as rigid as soon as I remove it from the oven.
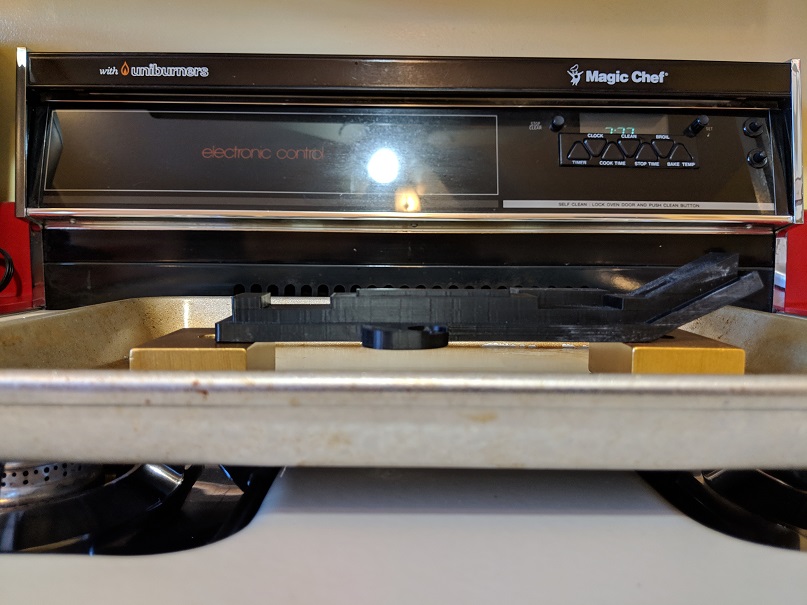
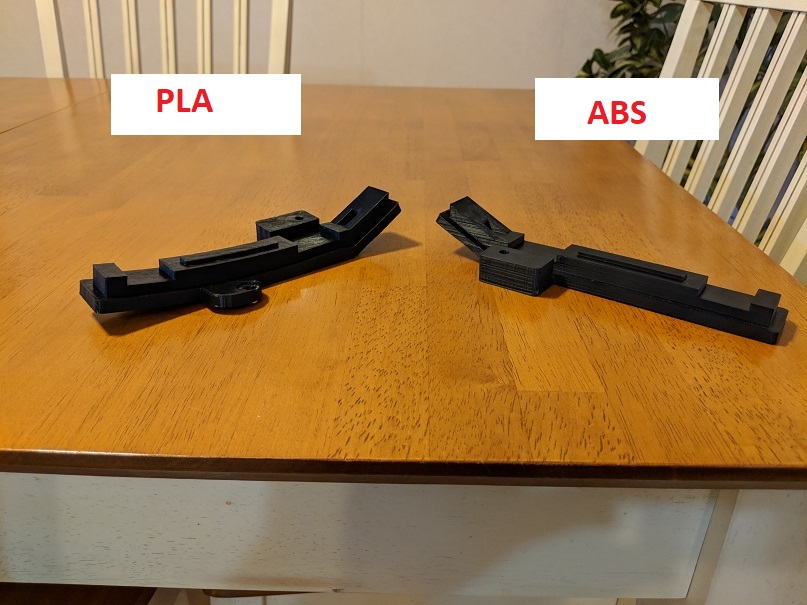
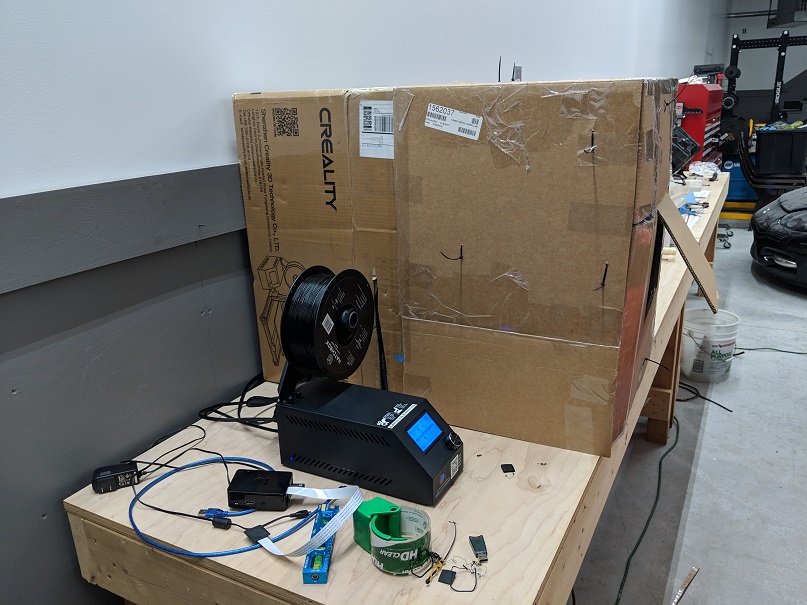
This is a look at the original cardboard box setup I used to keep the heat in. I have since built a nice enclosure to use that is documented here: https://802projects.com/blog/printerenclosure/printerenclosure.php.
Installation Instructions
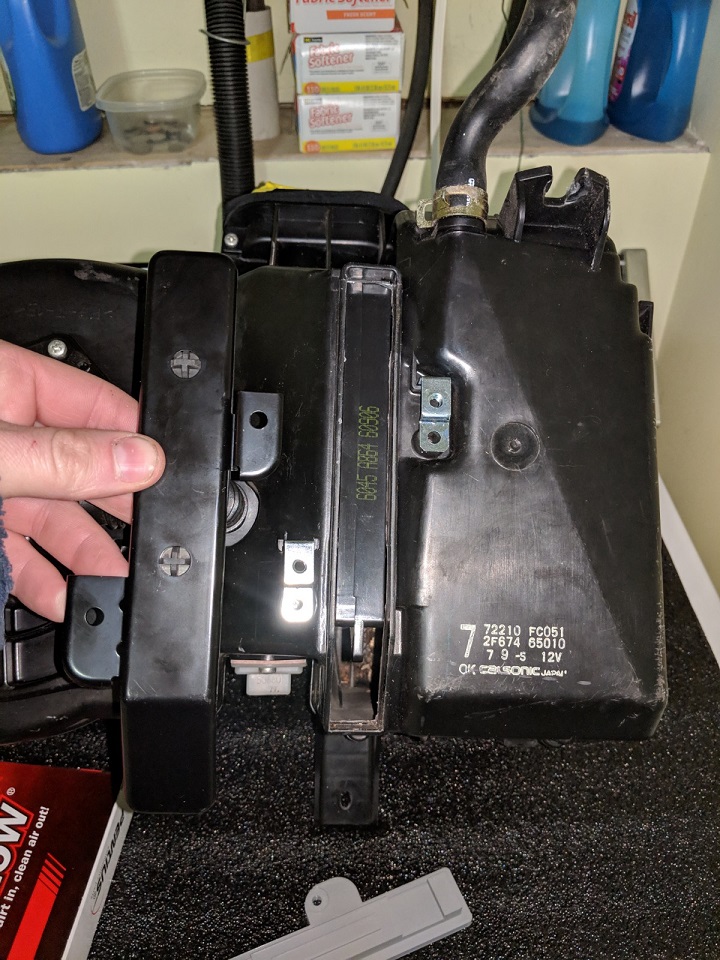
Before I begin, here is what the oem instructions look like in black and white.
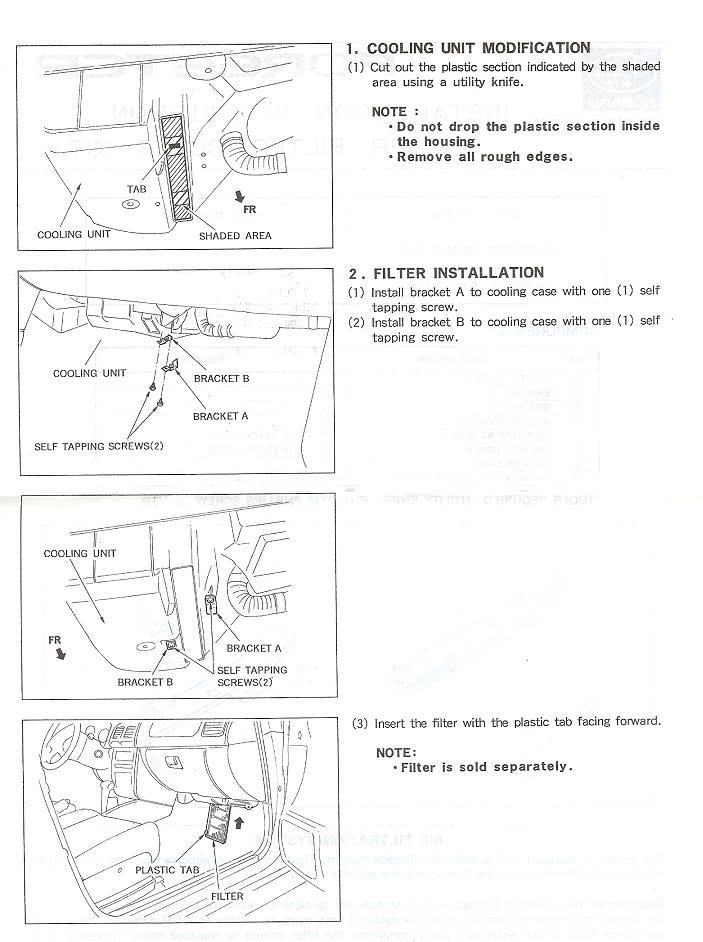
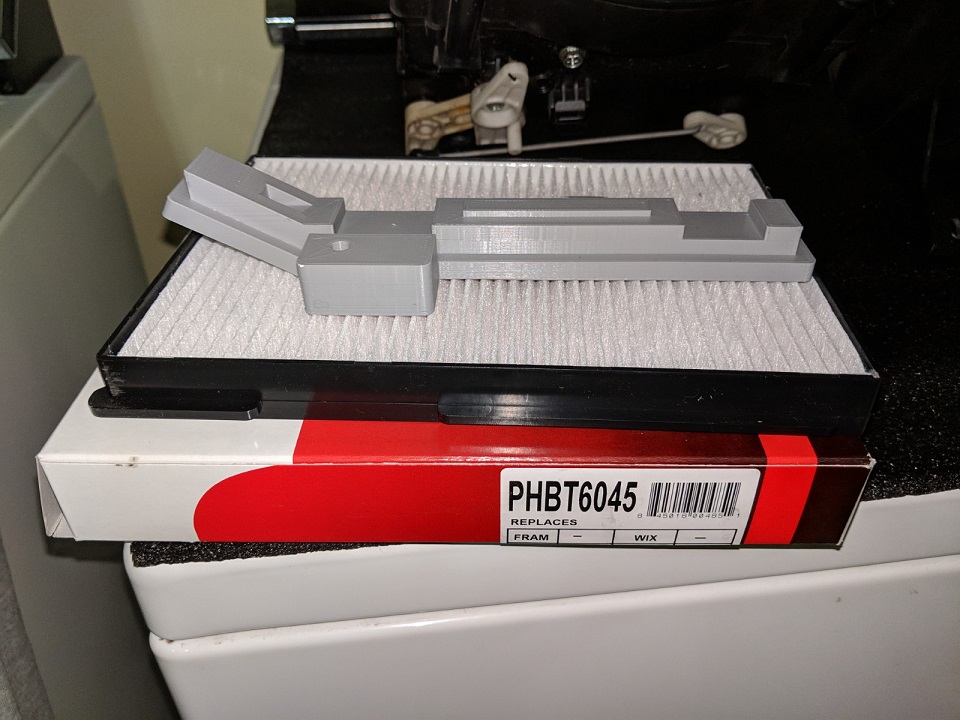
Step 1: Order an air filter. I would recommend the Pentius PHBT6045 air filter. It's an aftermarket version of the oem filter and about 1/3rd the price. You can get it off Amazon for ~ $16 shipped. It's what I test fit everything with.
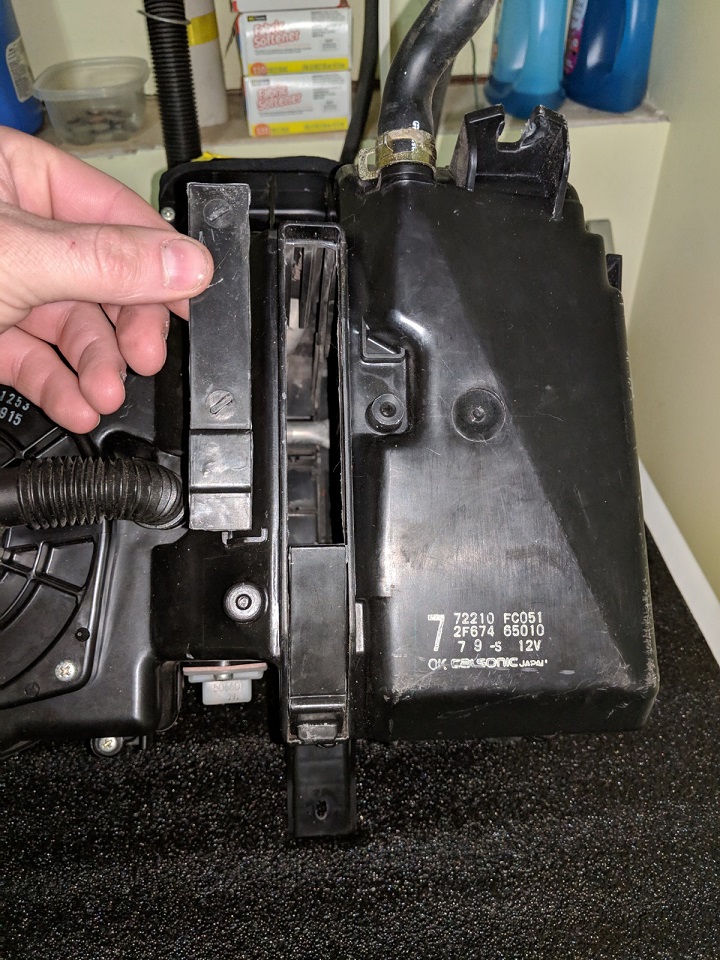
Step 2: Cut out the underside of the air box. Subaru has the opening marked. Take a sheet rock knife and lightly score the left/right side edges 4-5 times. Eventually the blade should break through. Afterwards just push the center plastic in/out several times and it should break out leaving an opening. it's a good idea to take a vacuum and air compressor to blow out any debris that may be in there. When I put the filter in my car I also pulled the blower motor just to clean out the area really well.
Step 3: Install the filter. The filter will slide up in the opening. There is a long ear on one corner of the filter. That ear goes on the bottom towards the back of the car. It's meant to fit in the slot of the filter cover as shown in the picture.

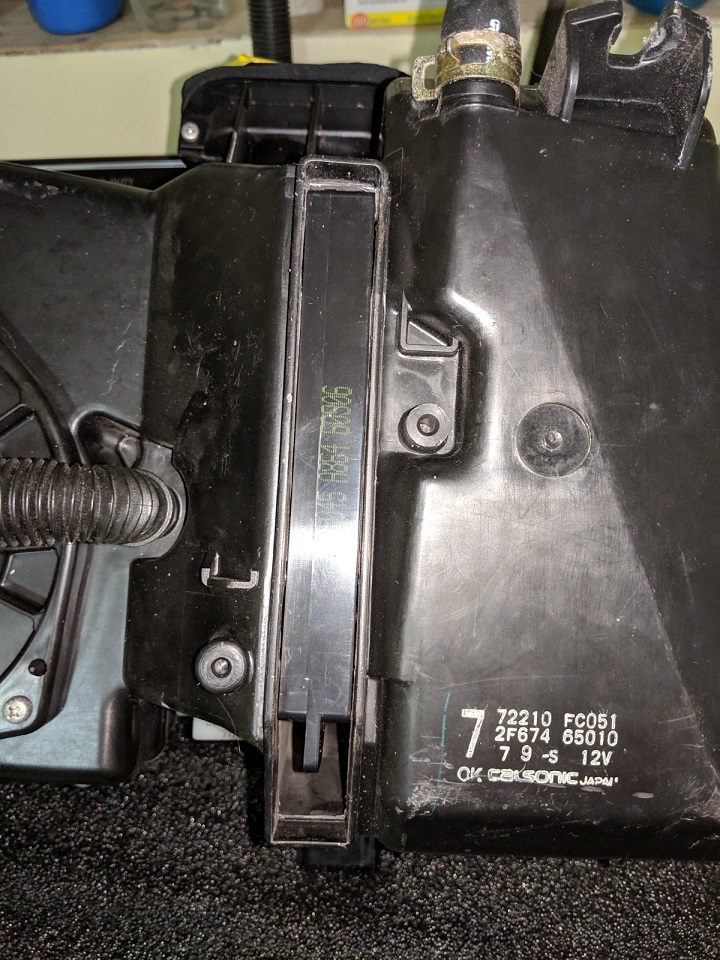
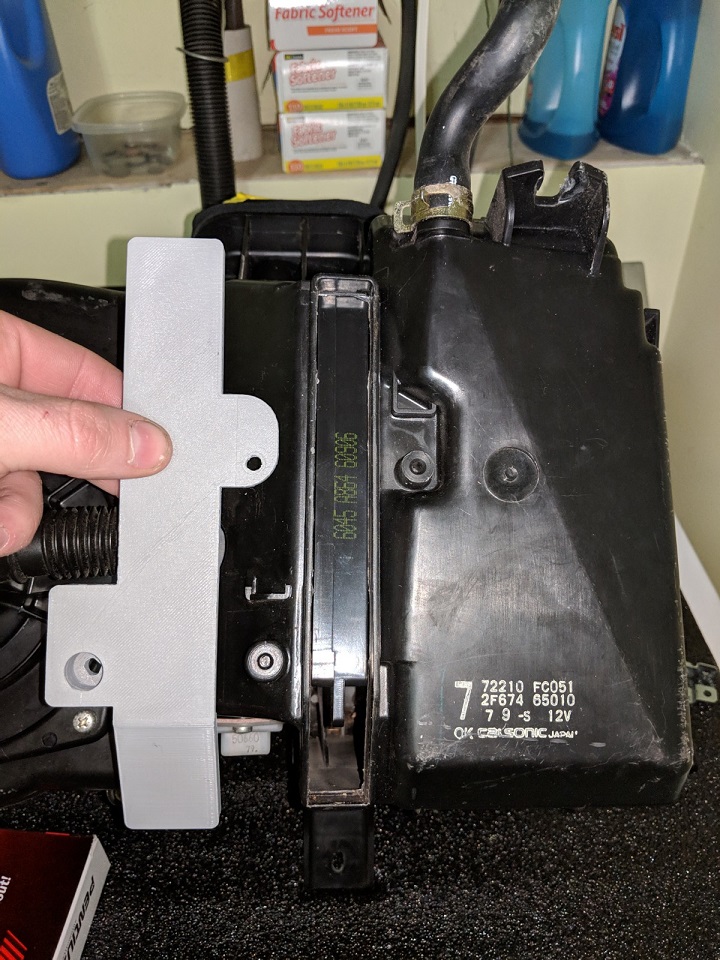
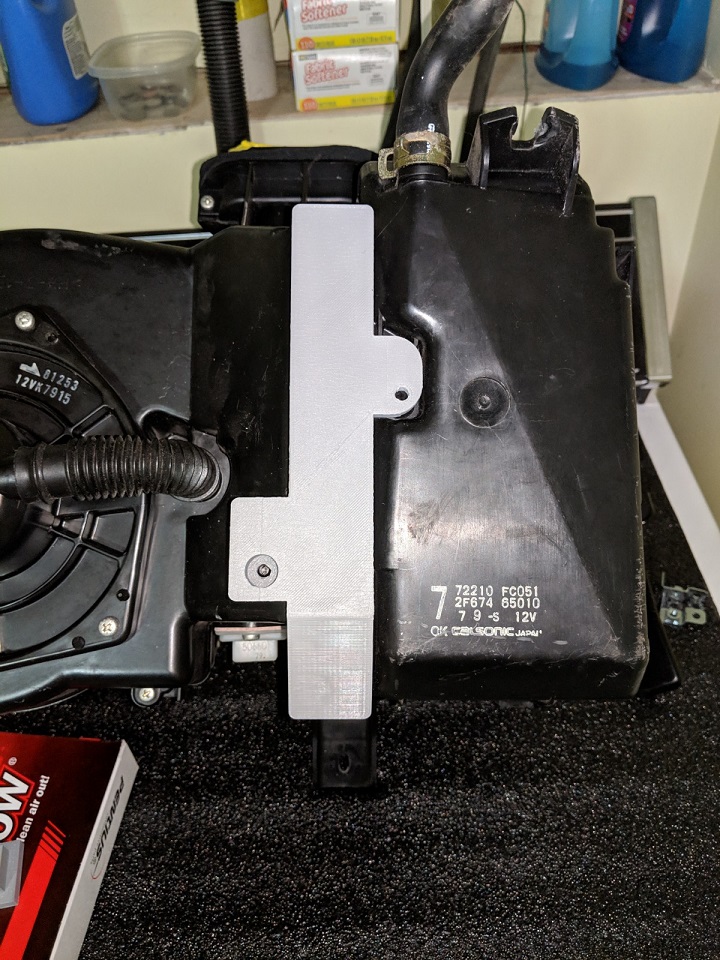
Step 4: Install the cover. Now the OEM cover would have 2 metal brackets that screw into the air box, and then the cover would screw to the brackets. My 3d printed cover eliminates the brackets and just uses the screw holes that the brackets normally attached to. When you install the plastic cover it is going to fit snug. It should also hold the filter up without any screws. Get it installed where it needs to be before adding the screws. Put the bent end in first, then push the back side up into place. Don't overtighten the screws and don't try to use the screws to pull the cover in. It's also an awkward angle to hold a screwdriver. It would help if you pre-threaded the screws first and maybe put a dab of grease on them.
Want to Purchase or Download a Cover?
If you have access to a 3D printer and want to print your own, you can click the link below to download my design FOR FREE. All I ask is that you Subscribe to my Youtube channel over on the side bar. If you don't have a 3D printer and would like to purchase one, you can email me at fastfalcon94@gmail.com and I can ship you one for $35 shipped (assuming you are in US). I'll try to keep a few printed at all times. The only color I have is black. Keep in mind you'll also need to purchase the PHBT6045 filter off Amazon for ~$16.24. Please check the FAQ if you have any questions. I also threw together a quick video below that is worth the watch.
Also other people have began printing my covers and selling them on eBay. I guess that is what I get for sharing my file with the Subaru community:/ Be weary of these. If they aren't printed in ABS they could melt/warp in vehicles. ABS is hard to work with and took me a while to dial in. I've began listing some myself as seller "tacoman200" if you'd rather purchase there.
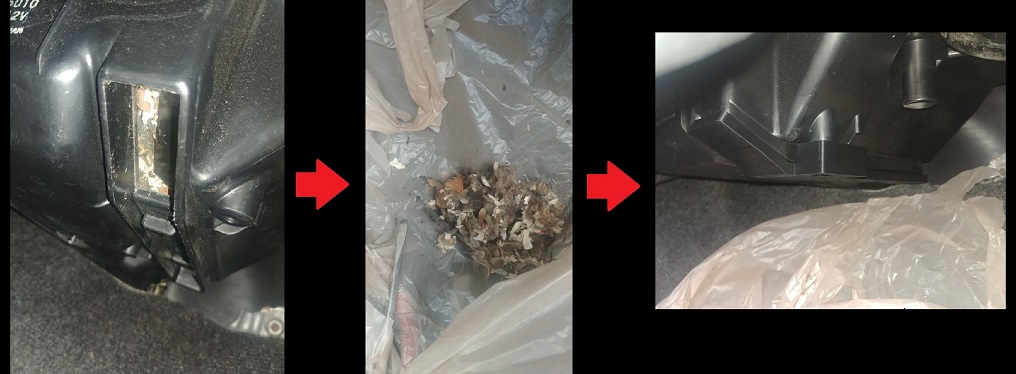
Edit 4/28/2019: I've sold a few covers already with positive feedback. Here are some pics from a customers car. Look at all the stuff that could be sitting at the bottom of your blower box.
FAQ
Will it work with the OEM filter?
I have not tested it. I do have an oem filter installed on my car. If it's a deal breaker for someone I could possibly remove it and find out. The aftermarket filter looks just as good to me and is 1/3rd the price so I'd recommend going that route.
Do they come with screws?
Yes I will include some screws. The oem Mitsubishi 3000gt interior screws seem to fit well and I have a lot of them from stripping/scrapping a few cars.
Can I buy a cover if I'm overseas?
Sure, just send me an email and I'll figure out what the extra shipping will be.
Will you do any discounts?
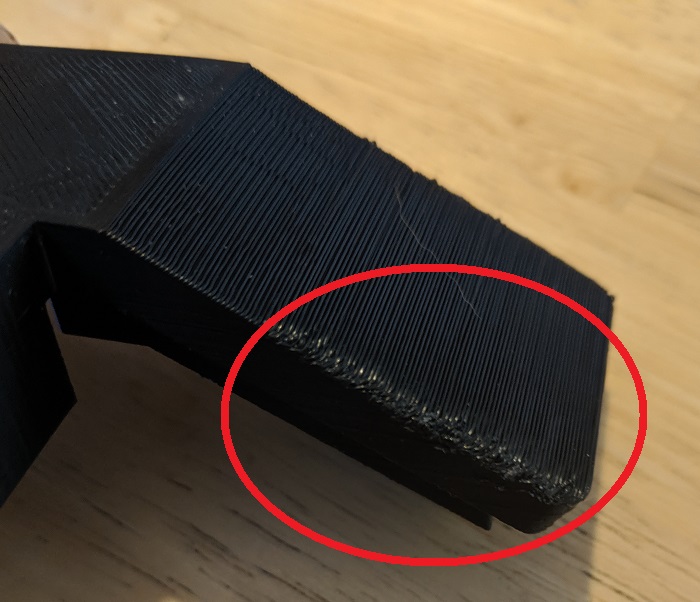
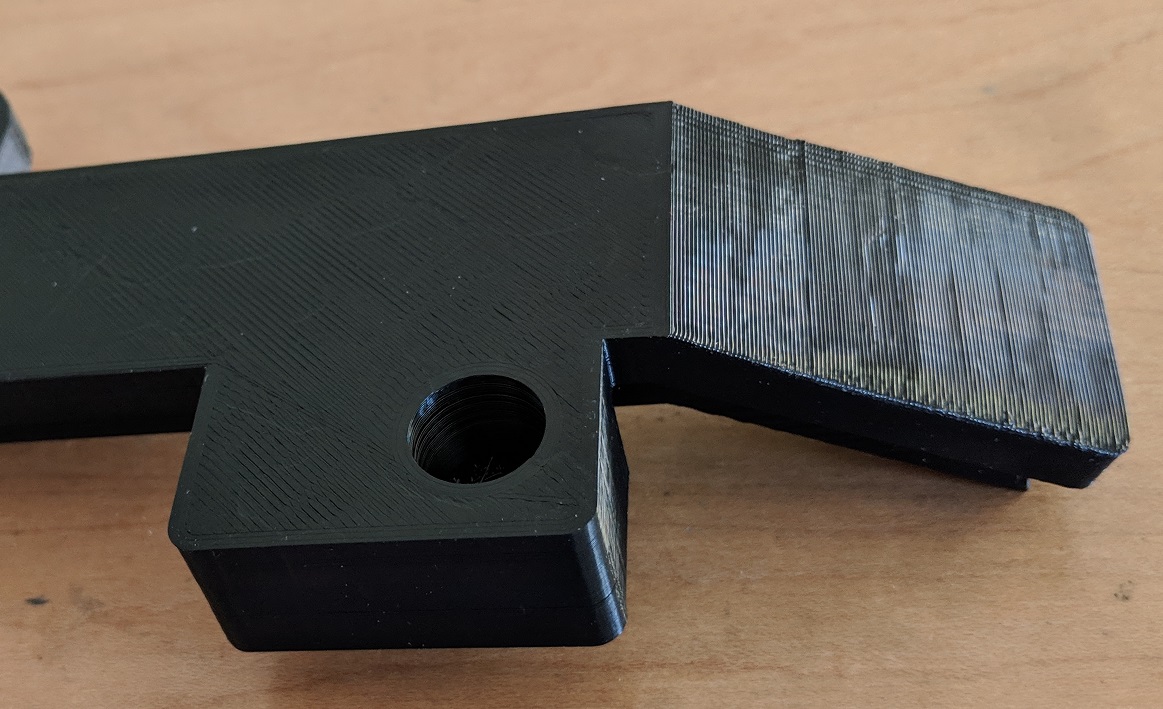
I will knock the price down some if you buy multiple covers. Occasionally I do end up with one that has some minor blemishes. It's less often now that I've made some upgrades to my printer. Normally it was one of the corners of the slanted part bubbling a little (see picture below). Maybe a corner starts to lift off the bed. Once I had a gob of melted abs get into the print. When I broke it off it left a little divot. The part is not visible once installed so it's not a huge deal. You can check with me if I have any blemished ones. I've been selling those for $20 shipped.
Can I sand or paint the cover?
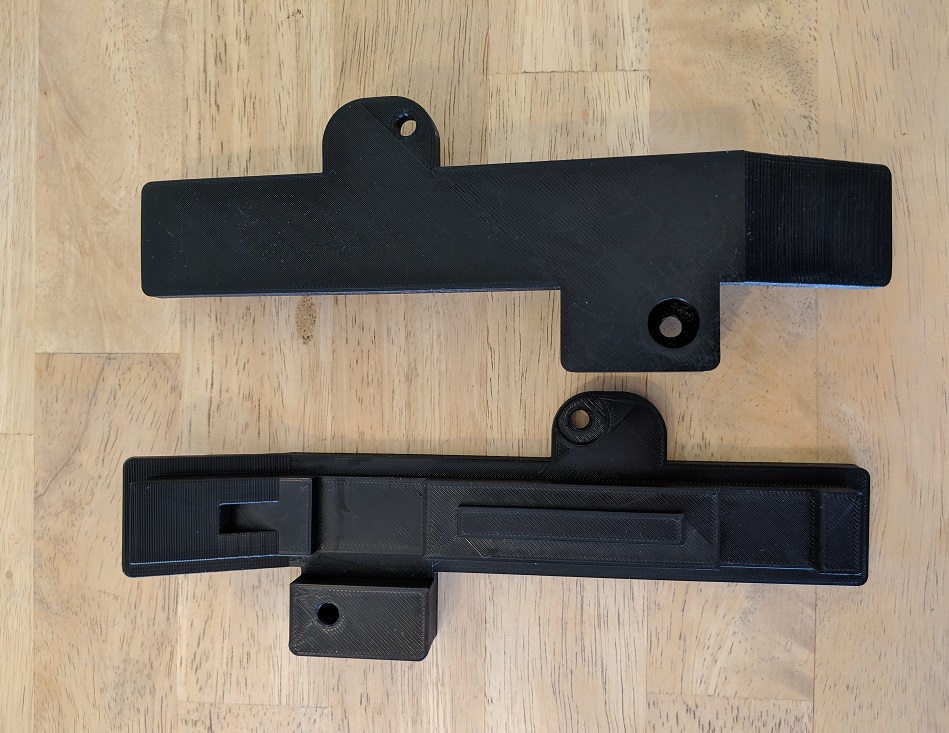
The covers are printed in draft mode (2.0mm z height). This takes about 4 hours and 30 minutes to print. I did a test in normal (1.5mm z height) and fine mode (1.0mm z height), but the quality wasn't much better considering amount of time they take to print. The cover obviously isn't visible once installed, but if you have OCD you are welcome to try and make the finish better. ABS can be sanded/filled/smoothed/painted. Here are some close up pictures of the finished product.
Will this fit the 1997 impreza?
At first it may look like it would work. If you look under the dash you'll see the same cutout spot. However if you break the plastic out you'll notice that there are some metal AC lines running above it. Meaning there is no room to slide the filter in. If you busted the plastic open and realized this, you can still buy a cover to seal it back up. Here is a picture.
